Customizing Your Network
- Introduction
- Branding Your Community
- Customizing the Homepage
- Setting Up a Custom Domain
- Email Customization
- Language and Localization
- Next Steps
Introduction
Customizing your Gush community helps create a unique identity that reflects your brand and resonates with your audience. This tutorial will guide you through the essential customization options to make your community stand out.
Branding Your Community
Strong branding helps your community feel professional and cohesive:
- Navigate to Settings > Appearance
- Upload your logo:
- Recommended size: 200x50 pixels
- Transparent PNG format works best
- Your logo will appear in the navigation bar and emails
- Set your brand colors:
- Primary color: Used for buttons, links, and highlights
- Secondary color: Used for accents and secondary elements
- Text color: Main color for text content
- Upload a favicon (the small icon that appears in browser tabs)
- Recommended size: 32x32 pixels
- PNG or ICO format
- Save your changes
Pro Tip: Choose colors that match your existing brand if you have one. Consistency across platforms helps with brand recognition.
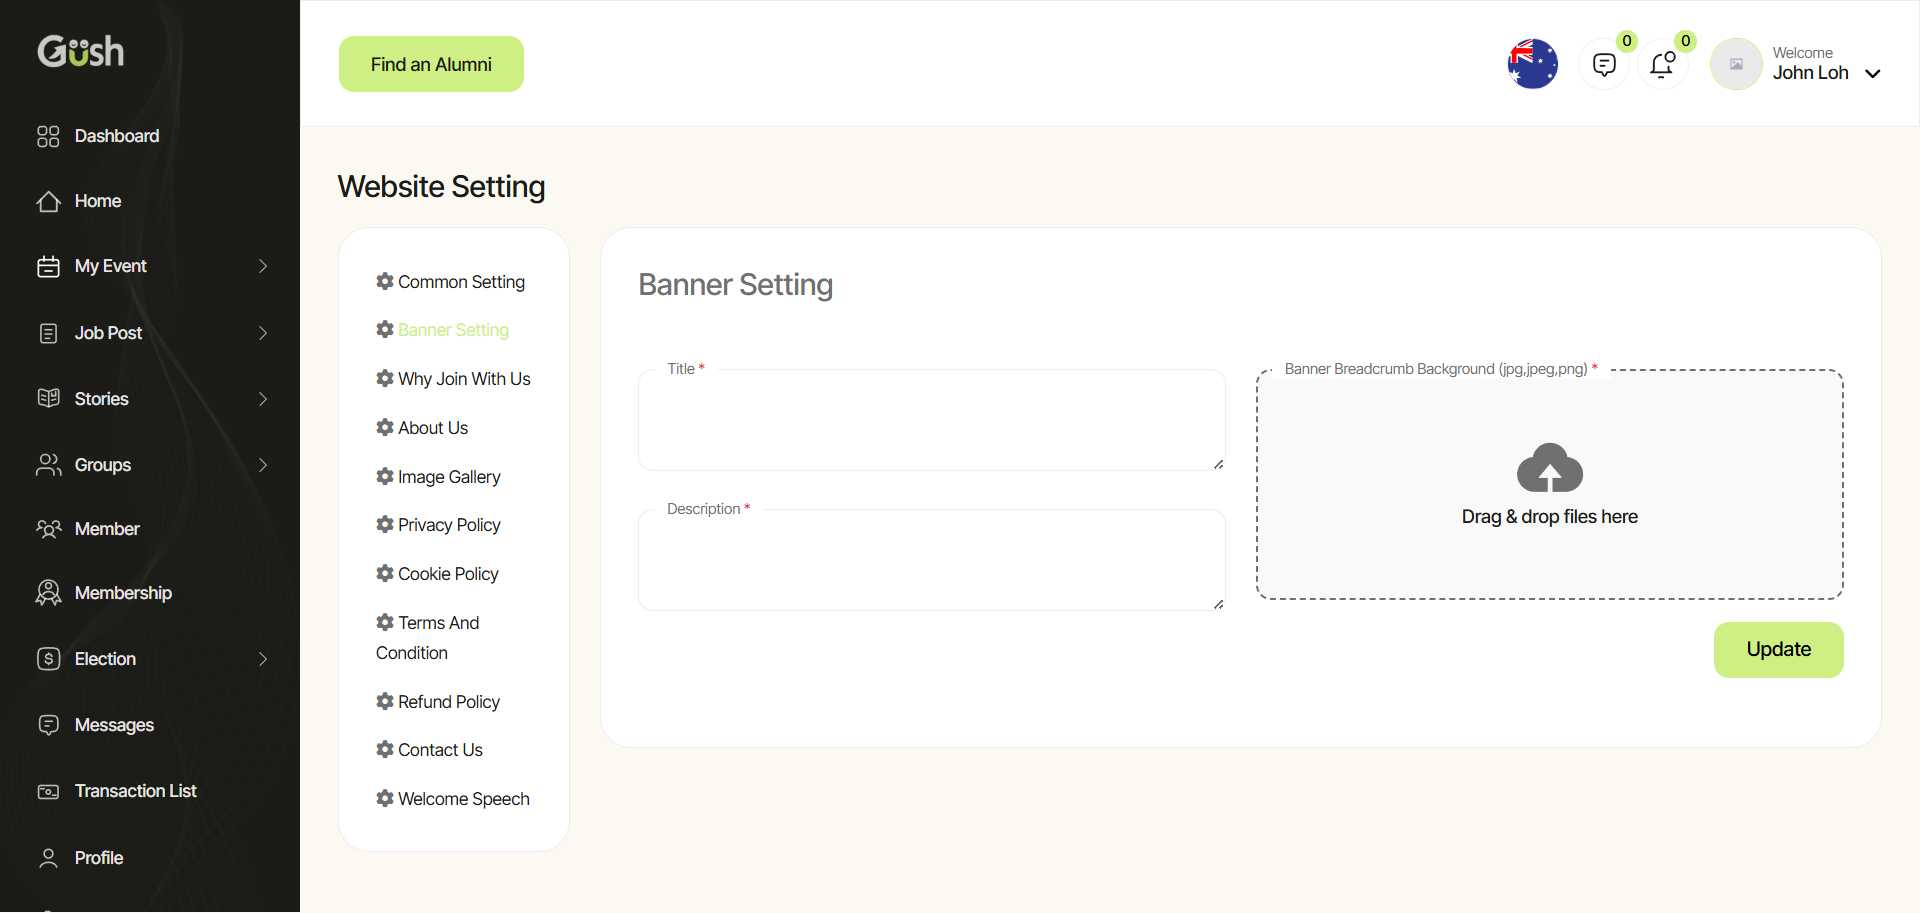
Customizing the Homepage
Your homepage is the first thing visitors see, so make it welcoming and informative:
- Go to Settings > Homepage
- Configure your banner:
- Upload a banner image (recommended size: 1200x400 pixels)
- Add a headline and subheading
- Include a call-to-action button
- Customize featured content:
- Select featured groups to highlight
- Choose featured posts to showcase
- Add testimonials or welcome messages
- Save your changes
Best Practices:
- Use high-quality images that represent your community's purpose
- Write clear, compelling headlines that explain your community's value
- Make sure your call-to-action is obvious and encourages visitors to join
Setting Up a Custom Domain
A custom domain (like yourcommunity.com instead of yourcommunity.gush.zone) adds professionalism:
- Go to Settings > Domain
- Choose your domain option:
- Use an existing domain you own
- Purchase a new domain through Gush
- If using your own domain:
- Enter your domain name
- Follow the instructions to update your DNS settings
- Verify your domain by clicking the verification button
- Set up SSL for secure connections
- Save your changes
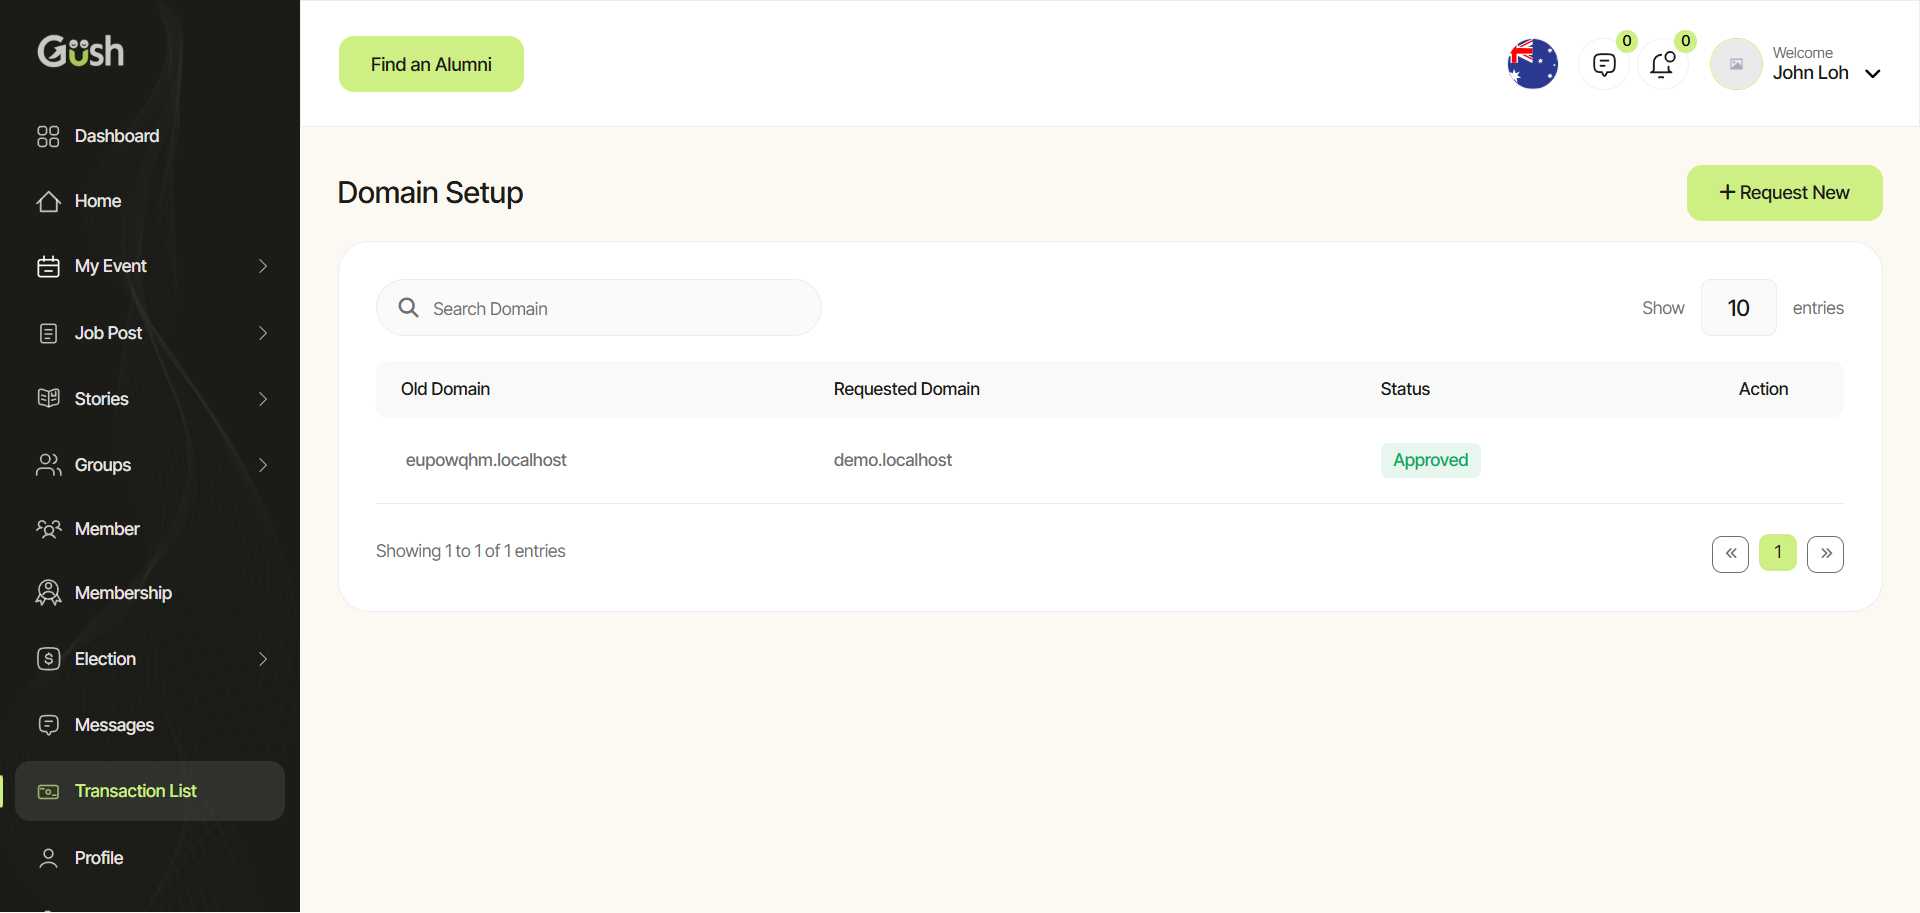
Note: DNS changes can take up to 48 hours to propagate. During this time, your custom domain might not work properly.
Email Customization
Personalize the emails sent from your community:
- Navigate to Settings > Email
- Customize email templates:
- Welcome email
- Notification emails
- Newsletter templates
- Configure email settings:
- Set the "From" name and email address
- Add your logo to email headers
- Customize email footer text
- Save your changes
Pro Tip: Keep emails concise and make sure your branding is consistent with your community site.
Language and Localization
Change the default language or customize specific text:
- In the Settings menu, select "Language"
- Choose your default language from the dropdown
- Use the text editor to customize specific phrases or messages
- Save your changes
Note: Not all languages may be fully supported. If you need a language that isn't available, contact Gush support.
Next Steps
Now that you've customized your community's appearance, you're ready to start building its structure:
- Create and Manage Groups - Organize your community with focused discussion areas
- Manage Members - Learn how to approve, manage, and engage with your community members
- Set Up Content Moderation - Ensure your community maintains high-quality discussions
Remember, you can always come back and adjust your customization settings as your community evolves.